This fixes #33 where a curtain image would cause the goexif2 library to panic. Now instead of crashing the entire program, it recovers and instead prints an error to the console and ignores the EXIF data for that image. |
||
|---|---|---|
| .vscode | ||
| api | ||
| screenshots | ||
| ui | ||
| .dockerignore | ||
| .gitignore | ||
| .prettierrc | ||
| Dockerfile | ||
| LICENSE.txt | ||
| README.md | ||
| docker-compose.example.yml | ||
README.md
PhotoView
Demo site
Visit https://photos.qpqp.dk/
Username: demo Password: demo
Contents
- Demo site
- Aim of the project
- Main features
- Why yet another self-hosted photo gallery
- Getting started - Setup with Docker
- Setup development environment
Aim of the project
The aim of this project is to make a simple and user-friendly photo gallery application, that is easy to host on a personal server, to easily view the photos located on that server.
Main features
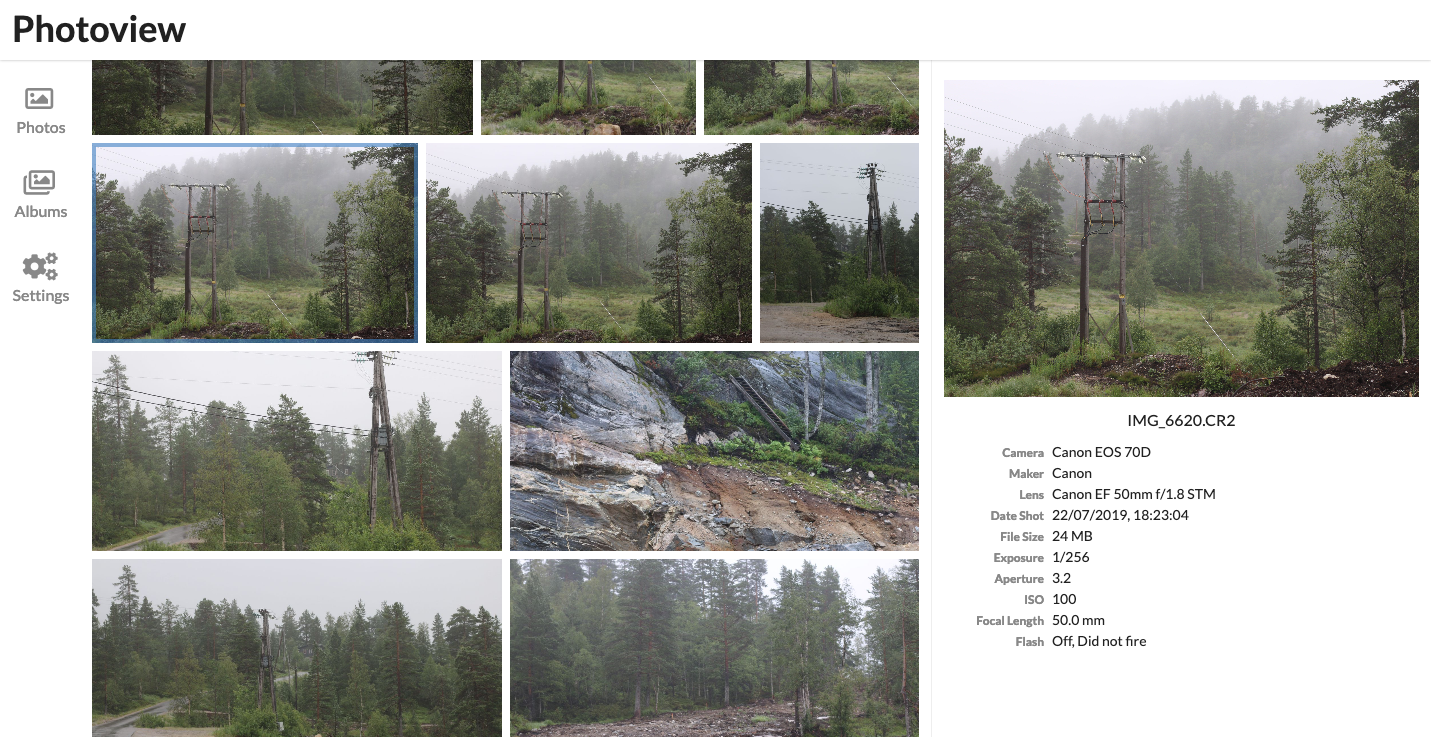
- Closely tied to the file system. The website presents the images found on the local filesystem of the server, directories are mapped to albums.
- User management. Each user is created along with a path on the local filesystem, photos within that path can be accessed by that user.
- Photo sharing. Photos and albums can easily be shared with other users or publicly with a unique URL.
- Made for photography. The website is ment as a way to present photographies, and thus supports RAW file formats, and EXIF parsing.
- Performant. Thumbnails are automatically generated and photos first load when they are visible on the screen. In full screen, thumbnails are displayed until the high resolution image has been fully loaded.
Why yet another self-hosted photo gallery
There exists a lot of open-source self-hosted photo galleries already. Here are some, just to mention a few.
So why another one? I love taking photos, and I store all of them on my local fileserver. This is great because I can organize my photos directly on the filesystem so it's easy to move them or take backups. I want to be able to control where and how the photos are stored.
The problem is however that RAW images are extremely tedious to navigate from a fileserver, even over the local network.
My server holds a lot of old family pictures, that I would like my family to have access to as well. And some of the pictures I would like to easily be able to share with other people without the hassle of them having to make an account first.
Thus I need a solution that can do the following:
- A scan based approach that automatically organises my photos
- Support RAW and EXIF parsing
- Have support for multiple users and ways to share albums and photos also publicly
- Be simple and fast to use
All of the photo galleries can do a lot of what I need, but no single one can do it all.
Getting started - Setup with Docker
This section describes how to get PhotoView up and running on your server with Docker. Make sure you have Docker and docker-compose installed and running on your server
- Clone this repository by executing
$ git clone https://github.com/viktorstrate/photoview
$ cd photoview
- Duplicate
docker-compose.example.ymland name the new filedocker-compose.yml - Edit
docker-compose.yml, find the comments starting withChange This:, and change the values, to properly match your setup. If you are just testing locally, you don't have to change anything. - Start the server by running the following command, inside the
photoviewdirectory
$ docker-compose up -d
If the endpoint or the port hasn't been changed in the docker-compose.yml file, PhotoView can now be accessed at http://localhost:8000
Initial Setup
If everything is setup correctly, you should be presented with an initial setup wizard, when accessing the website the first time.
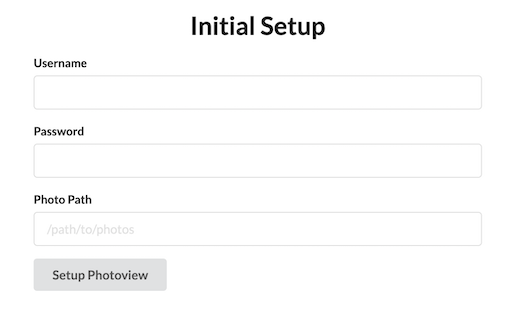
Enter a new username and password.
For the photo path, enter the path in the docker container where your photos are located.
This can be set from the docker-compose.yml file under api -> volumes.
The default location is /photos
A new admin user will be created, with access to the photos located at the path provided under the initial setup.
The photos will have to be scanned for the photos to show up, you can force a scan, by navigating to Settings and clicking on Scan All
Setup development environment
Local setup
- Install a local mysql server, and make a new database
- Rename
/api/example.envto.envand update theMYSQL_URLfield - Rename
/ui/example.envto.env
/api
Start API server
cd ./api && go run server/server.go
/ui
The above command will start the GraphQL API in the foreground, so in another terminal session start the UI development server:
Start UI server
cd ./ui && npm start
The site can now be accessed at localhost:1234. And the graphql playground at localhost:4001