3.3 KiB
PhotoView
SERVER REWRITE. The api is currently being rewritten in Golang, use branch old-nodejs-server for the most stable release
Demo site
Visit https://photos.qpqp.dk/
Username: demo Password: demo
Aim of the project
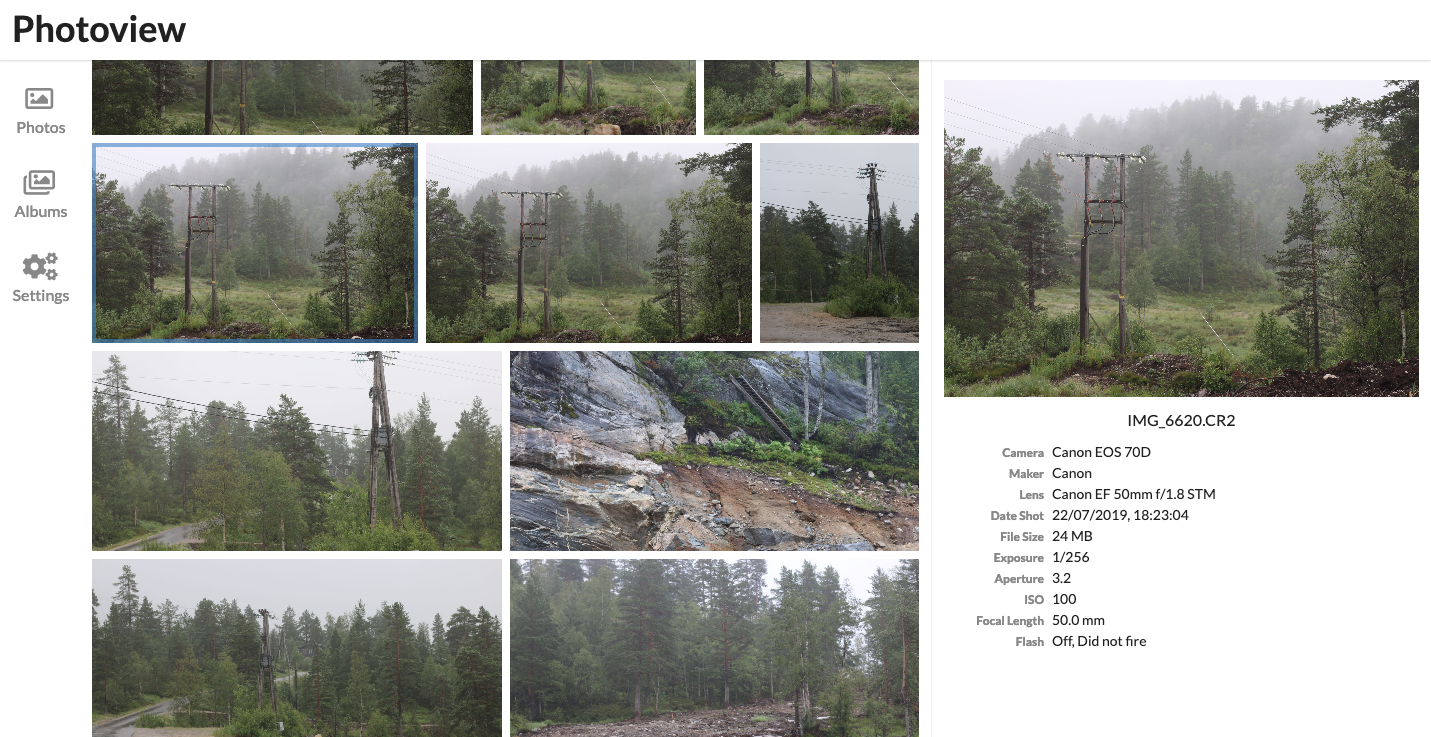
The aim of this project is to make a simple and user-friendly photo gallery application, that is easy to host on a personal server, to easily view the photos located on that server.
Main features
The software is still in early development, and many of the following features, may not have been fully implemented yet.
- Closely tied to the file system. The website presents the images found on the local filesystem of the server, directories are mapped to albums.
- User management. Each user is created along with a path on the local filesystem, photos within that path can be accessed by that user.
- Photo sharing. Photos and albums can easily be shared with other users or publicly with a unique URL.
- Made for photography. The website is ment as a way to present photographies, and thus supports RAW file formats, and EXIF parsing.
Getting started - Setup with Docker
This section describes how to get PhotoView up and running on your server with Docker. Make sure you have Docker and docker-compose installed and running on your server
- Clone this repository by executing
$ git clone https://github.com/viktorstrate/photoview
$ cd photoview
- Duplicate
docker-compose.example.ymland name the new filedocker-compose.yml - Edit
docker-compose.yml, find the comments starting withChange This:, and change the values, to properly match your setup. - Start the server by running the following command, inside the
photoviewdirectory
$ docker-compose up -d
If the endpoint or the port hasn't been changed in the docker-compose.yml file, PhotoView can now be accessed at http://localhost:8080
Initial Setup
If everything is setup correctly, you should be presented with an initial setup wizard, when accessing the website the first time.
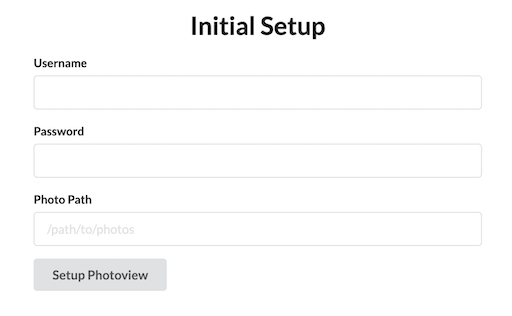
Enter a new username and password.
For the photo path, enter the path in the docker container where your photos are located.
This can be set from the docker-compose.yml file under api -> volumes.
The default location is /photos
A new admin user will be created, with access to the photos located at the path provided under the initial setup.
The photos will have to be scanned for the photos to show up, you can force a scan, by navigating to Settings and clicking on Scan All
Setup development environment
Local setup
- Install a local mysql server, and make a new database
- Rename
/api/example.envto.envand update theMYSQL_URLfield - Rename
/ui/example.envto.env
/api
Start API server
cd ./api && go run server/server.go
/ui
The above command will start the GraphQL API in the foreground, so in another terminal session start the UI development server:
Start UI server
cd ./ui && npm start
The site can now be accessed at localhost:1234. And the graphql playground at localhost:4001